Set Up an Alert
Alerts keep you up to date with everything you want to know about your operation, in real time. These alerts can be viewed through the My Alerts section, or through direct emails.
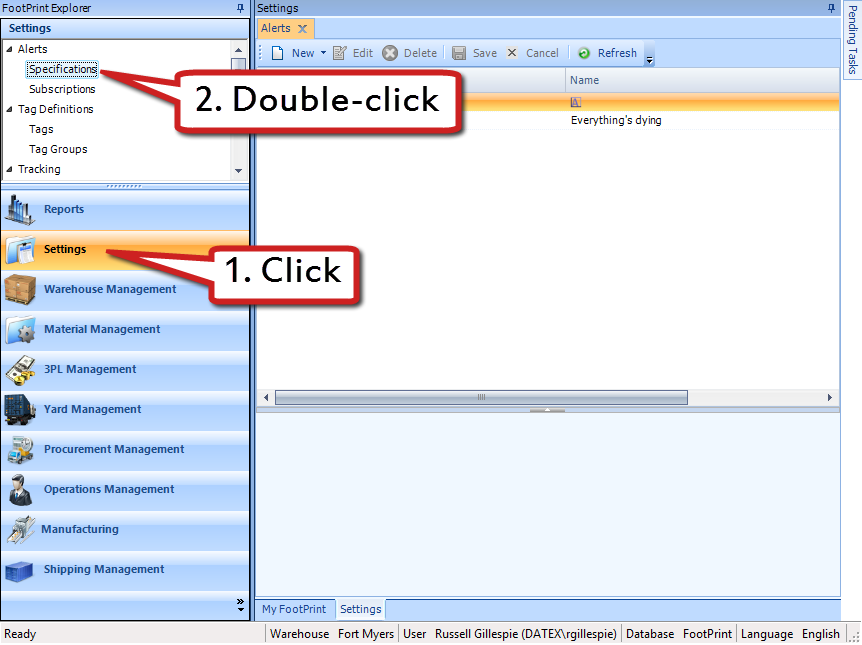
1. Click the Settings module in the Footprint Explorer.
2. Double-click the Specifications section under the Alerts heading.
There are several different options for your Alerts, depending on what you want to be notified of.
Click the New button to open a drop-down list of options.
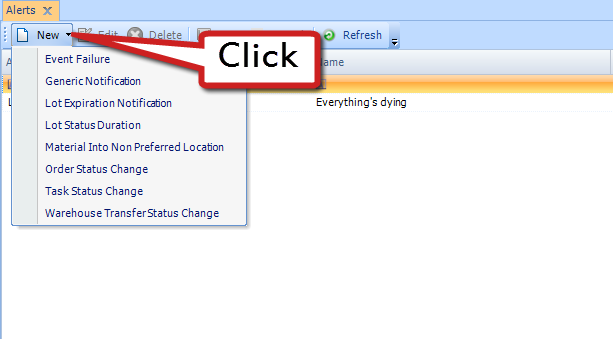
Select one of the following Alert options:
If something goes wrong in the system, and an operation is unable to complete, this Alert will let you know about it.
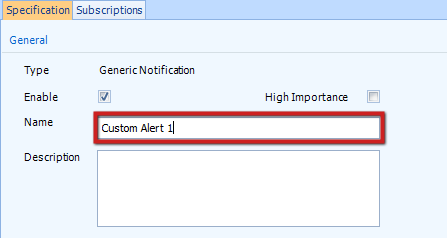
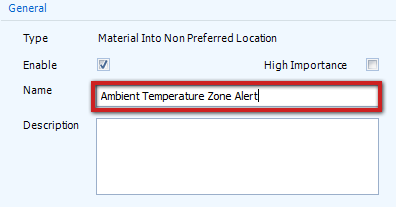
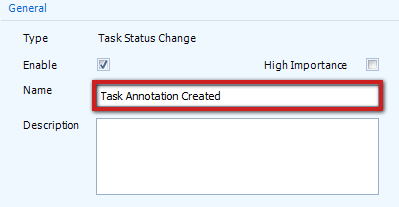
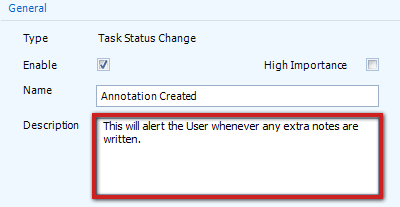
1. Name the Alert.
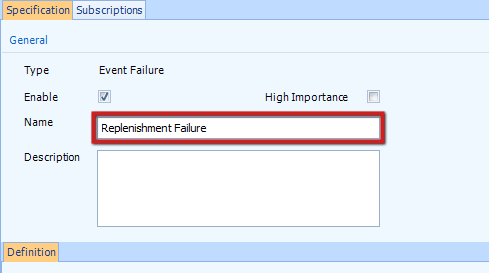
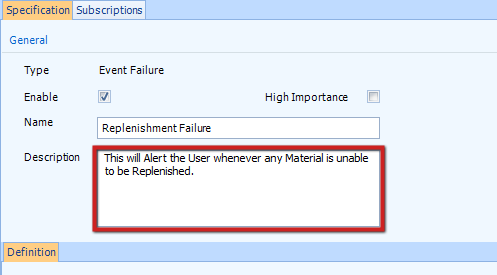
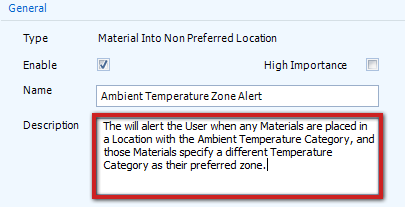
2. (Optional) Add a Description to the Alert, describing what it is for.
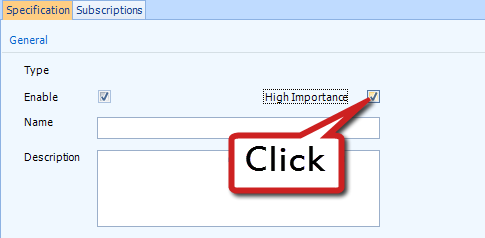
3. (Optional) If the Alert is for something especially important, put a check in the High Importance box, and it will be given a higher priority in the My Alerts list, along with a High Importance icon ( ).
).
4. Select the Event Type you'd like to receive notifications about from the drop-down list in the Definition tab.
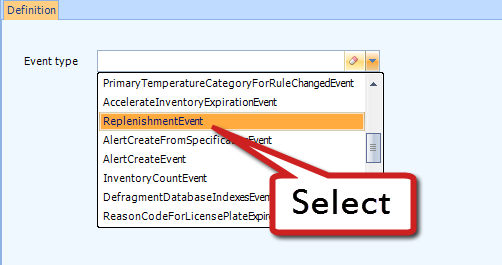
The list of Event Types you can be notified of on Failure is extensive, but most Types are fairly self-explanatory. For a detailed explanation of each type of Event, see the Alert Specifications guide.
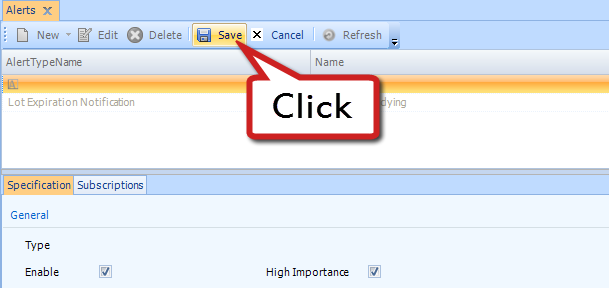
5. Save the Alert by clicking the Save button at the top of the screen.
The Generic Notification is in place so that you can have custom Alerts created for you. Representatives at Datex can work with you to set up specific Alerts for you and have them implemented in your installation of Footprint. Once that is done, then you can set up those Alerts here. Contact Datex Corporation for more information about setting up these types of Alerts.
1. Name the Alert.
2. (Optional) Add a Description to the Alert, describing what it is for.
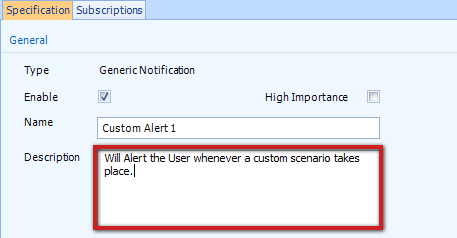
3. (Optional) If the Alert is for something especially important, put a check in the High Importance box, and it will be given a higher priority in the My Alerts list, along with a High Importance icon ().
4. Enter the Topic in the Definition area. This will be provided by the Datex representatives who create the custom Alert for you.
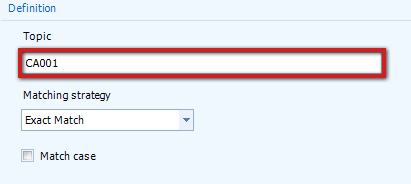
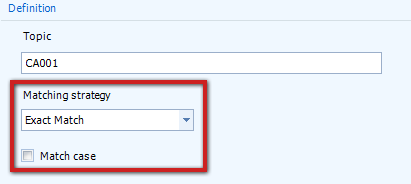
5. The Matching Strategy will also be determined by the Datex representative, and they will let you know how best to configure these settings.
6. Save the Alert by clicking the Save button at the top of the screen.
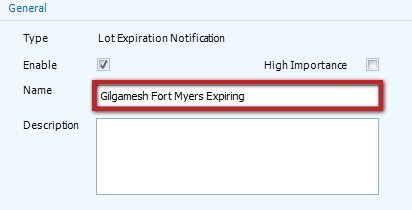
The Lot Expiration Notification alerts you to when any Lots under a particular Warehouse, Owner, Project, or combination of the three is going to expire. The Alert will begin 20 days before the Lot expires.
1. Name the Alert.
2. (Optional) Add a Description to the Alert, describing what it is for.

3. (Optional) If the Alert is for something especially important, put a check in the High Importance box, and it will be given a higher priority in the My Alerts list, along with a High Importance icon ().
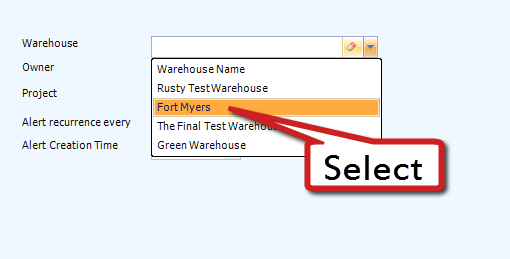
4. In the Definitions tab, select a Warehouse you'd like this Alert to be specific to. If left blank, the Alert will apply to all Warehouses.
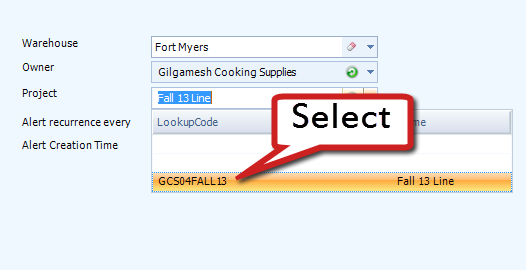
5. Select an Owner you'd like this Alert to be specific to. If left blank, the Alert will apply to all Owners.

6. Select a Project you'd like this Alert to be specific to. If left blank, the Alert will apply to all Projects (or all Projects underneath the specified Owner).
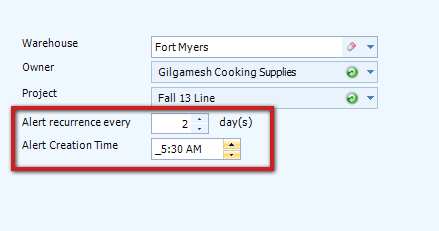
7. Set how often you'd like the Alert to recur (in days), and at what time you'd like the system to generate the Alert.
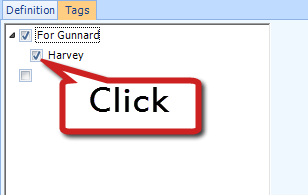
8. If you have Tags set up that you'd like the Alerts to be specific to, select all Tags that apply under the Tag tab.
Note
These Tags will have to be enabled for Lots.
9. Save the Alert by clicking the Save button at the top of the screen.
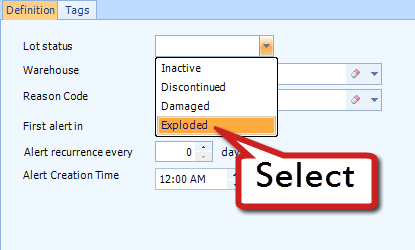
The Lot Status Duration Alert lets you know when a Lot status has changed from Active to either Inactive, Discontinued, Damaged, or any custom Inventory Status you have set up (see Setting Up Inventory Statuses). It will continue to alert you at the frequency you have set, until the Lot's status has been changed back to Active.
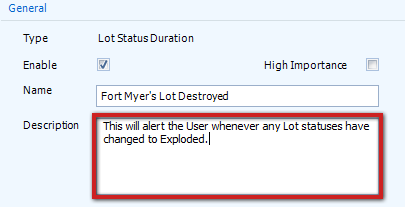
1. Name the Alert.
2. (Optional) Add a Description to the Alert, describing what it is for.
3. (Optional) If the Alert is for something especially important, put a check in the High Importance box, and it will be given a higher priority in the My Alerts list, along with a High Importance icon ().
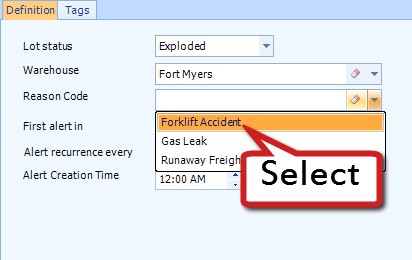
4. In the Definitions tab, choose the Status you'd like to set the Alert for. This field is required.
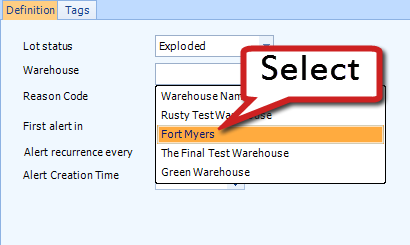
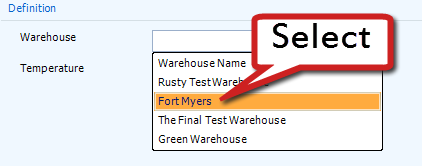
5. Select a Warehouse you'd like this Alert to be specific to. If left blank, the Alert will apply to all Warehouses.
6. Select a Reason Code you'd like this Alert to be specific to (when changing the Status of a Lot, if this Reason Code is selected, you will receive this Alert, otherwise you will not). If left blank, the Alert will apply to any Reason Code for the Status selected. See the Setting Up Reason Codes tutorial for more information.
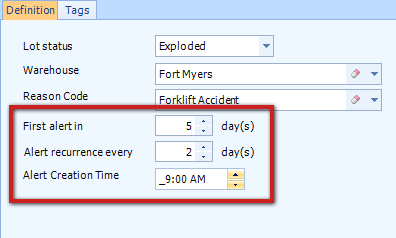
7. Set when you'd like the Alert to first occur after the Status change, how often you'd like the Alert to recur (in days) after that, and at what time you'd like the system to generate the Alerts.
8. If you have Tags set up that you'd like the Alerts to be specific to, select all Tags that apply under the Tag tab.
Note
These Tags will have to be enabled for Lots.
9. Save the Alert by clicking the Save button at the top of the screen.
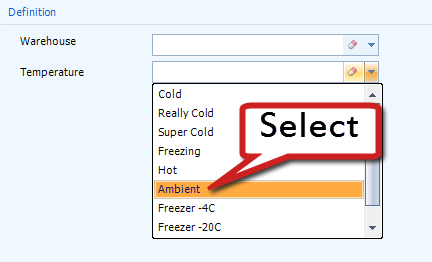
The Material Into Non-Preferred Location Alert is designed to let you know when Inventory is being stored in a Location that it should not be stored in. For example, if cartons of Ice Cream were being placed for storage in an Ambient Temperature Location. You will need to set up a rule for each Temperature Category you want an Alert for.
1. Name the Alert.

2. (Optional) Add a Description to the Alert, describing what it is for.
3. (Optional) If the Alert is for something especially important, put a check in the High Importance box, and it will be given a higher priority in the My Alerts list, along with a High Importance icon ().
4. In the Definition area, Select a Warehouse you'd like this Alert to be specific to. If left blank, the Alert will apply to all Warehouses.
5. Choose the Temperature Category this Alert will be warning you for. If left blank, the Alert will apply to all Temperature Categories.
6. Save the Alert by clicking the Save button at the top of the screen.
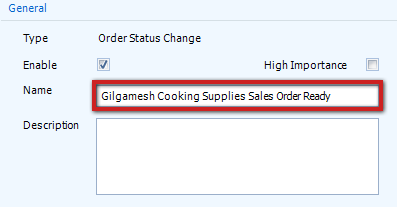
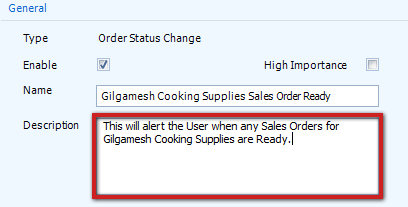
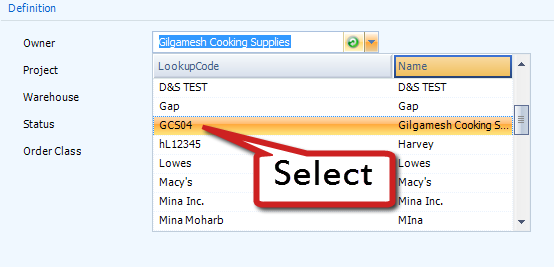
The Order Status Change Alert will let you know when an Order Status has been changed. It can be set up for any Order Status, or configured without a Status to let you know of any change, and can be specific to Owners, Projects, Warehouses, and Order Classes.
1. Name the Alert.
2. (Optional) Add a Description to the Alert, describing what it is for.
3. (Optional) If the Alert is for something especially important, put a check in the High Importance box, and it will be given a higher priority in the My Alerts list, along with a High Importance icon ().
4. In the Definition area, select an Owner you'd like this Alert to be specific to. If left blank, the Alert will apply to all Owners.
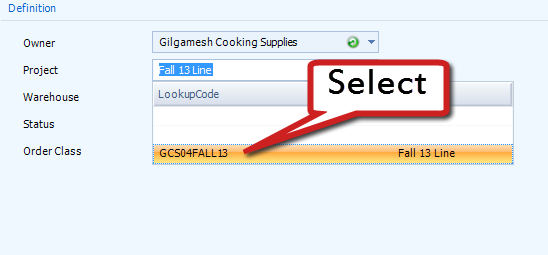
5. Select a Project you'd like this Alert to be specific to. If left blank, the Alert will apply to all Projects (or all Projects underneath the specified Owner).
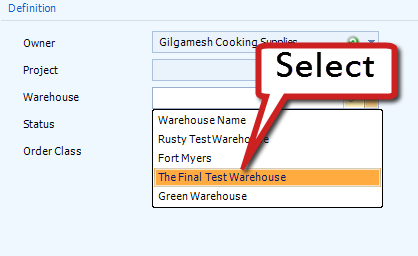
6. Select a Warehouse you'd like this Alert to be specific to. If left blank, the Alert will apply to all Warehouses.
7. Choose the Order Status that, upon Orders being changed to, you will receive Alerts for. If left blank, you will receive an Alert for any Status change.
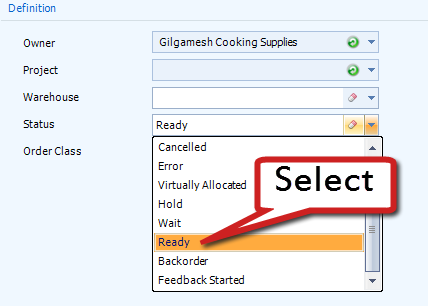
Most Statuses are fairly self-explanatory. For a detailed explanation of each Status, see the Alert Specifications guide.
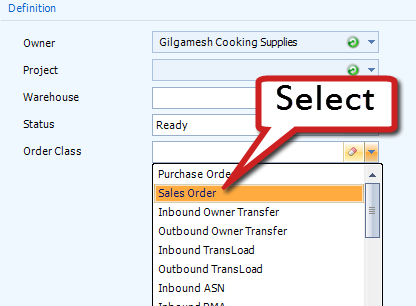
8. Choose the Order Class that you would like to receive Status Change Alerts for. If left blank, you will receive an Alert for Status changes to all Order Classes.
9. Save the Alert by clicking the Save button at the top of the screen.
The Task Status Change Alert is similar to the Order Status Change Alert in that the notification is created as a result of a Status change. But this type of Alert is much more customizable, giving you the ability to configure it by any Operation Type or Operation Code.
Warning
Nearly everything done in Footprint changes the Status of a Task. If all fields are left blank here, many, many Alerts will be created during the course of a normal day of operation. This is not recommended.
1. Name the Alert.
2. (Optional) Add a Description to the Alert, describing what it is for.
3. (Optional) If the Alert is for something especially important, put a check in the High Importance box, and it will be given a higher priority in the My Alerts list, along with a High Importance icon ().
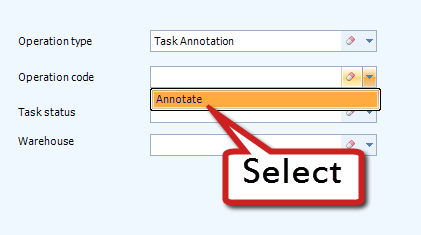
4. In the Definitions tab, select an Operation Type you'd like this Alert to be specific to. If left blank, the Alert will apply to any Operation Type.

5. In the Definitions tab, select an Operation Code you'd like this Alert to be specific to. If left blank, the Alert will apply to any Operation Code of the chosen Type.
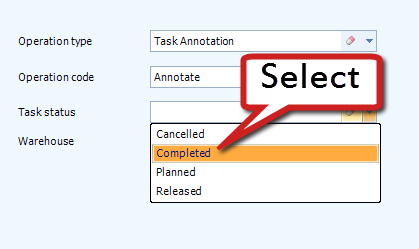
6. In the Definitions tab, select a Task Status you'd like this Alert to be specific to. If left blank, the Alert will apply to any Task Status.
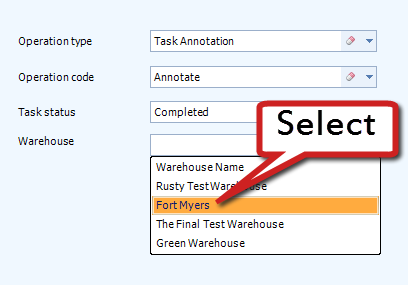
7. Select a Warehouse you'd like this Alert to be specific to. If left blank, the Alert will apply to all Warehouses.
8. If you have Tags set up that you'd like the Alerts to be specific to, select all Tags that apply under the Tag tab.
Note
These Tags will have to be enabled for Lots.
9. Save the Alert by clicking the Save button at the top of the screen.
The Warehouse Transfer Status Change Alert can Alert you for any Status changes during Warehouse Transfers involving whichever Warehouses you specify.
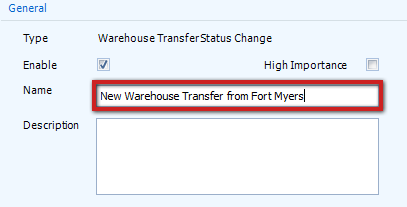
1. Name the Alert.
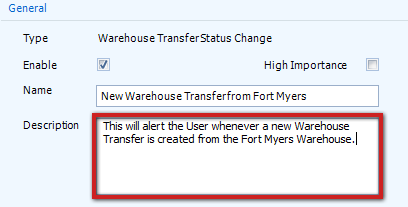
2. (Optional) Add a Description to the Alert, describing what it is for.
3. (Optional) If the Alert is for something especially important, put a check in the High Importance box, and it will be given a higher priority in the My Alerts list, along with a High Importance icon ().
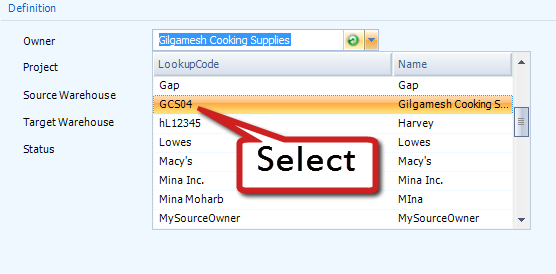
4. In the Definition area, select an Owner you'd like this Alert to be specific to. If left blank, the Alert will apply to all Owners.
5. Select a Project you'd like this Alert to be specific to. If left blank, the Alert will apply to all Projects (or all Projects underneath the specified Owner).
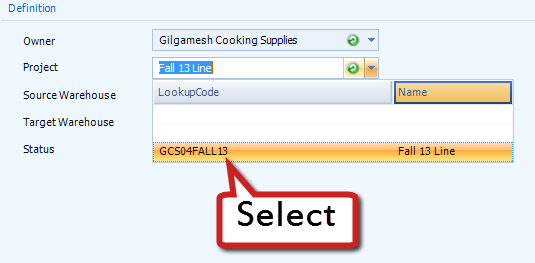
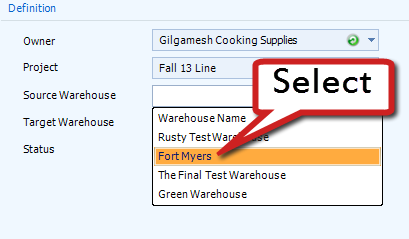
6. Any Status changes to Warehouse Transfers originating at the selected Source Warehouse will be tracked by this Alert. If left blank, the Alert will apply to any Source Warehouses.
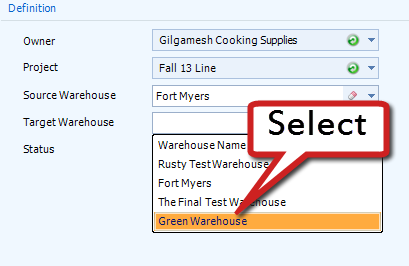
7. Any Status changes to Warehouse Transfers ending at the selected Target Warehouse will be tracked by this Alert. If left blank, the Alert will apply to any Target Warehouses.
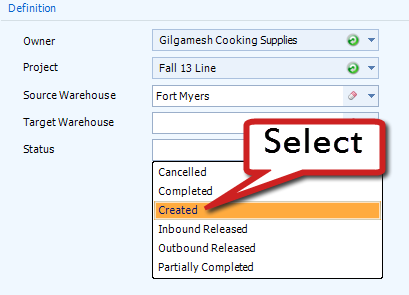
8. Choose the type of Status that you would like to receive an Alert for. If left blank, you will receive an Alert for any type of Status changes to Warehouse Transfers.
9. Save the Alert by clicking the Save button at the top of the screen.
| Last Updated: |
| 06/06/2025 |
Copyright © 2025 Datex Corporation